Stump, rotgut, corn whiskey, hooch. No matter what you call it there�s no other drink like moonshine. And it�s not only that it hits you hard just the right way, but that it�s also surrounded by a certain flair of risk and hillbilly romanticism associated with the very process of making it.
This in-depth guide will take you through all the steps, precautions, and decisions you need to make while testing your hand at making moonshine. There's no doubt about it; homemade liquor is a delicate process and you should be informed on how to pick your still, prep your mash, control your distillation, make your cuts, and end up with a potent product. That's what we aim to provide here.
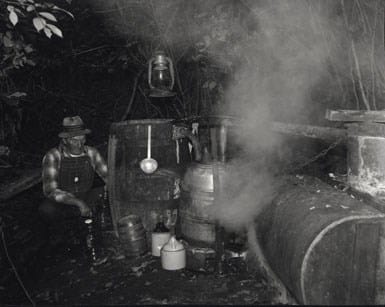
The Basics of Moonshine
Learning how to make moonshine on your own isn�t rocket science. Unless, of course, you�re making rocket fuel. Which we certainly discourage drinking in the first place.
Jokes aside, the process of making moonshine isn�t as complicated as it may look at first and can be accomplished with a set of basic tools and equipment that can be purchased in a typical convenience store. After all, people were making different versions of moonshine all over the globe for hundreds of years with much simpler tools than we have at our disposal these days.
I'm so excited to prepare so many #recipes of #drinks, #cocktails, #Moonshine, #food - I'm ready to get down to work! #Moonshinerecipe
What is Moonshine?
In essence moonshine is distilled liquor made from any grain or fruit - most often whatever is easily accessible in a given area. Classic moonshine as we know it today primarily uses corn as the main source of fermentable sugar simply because it was cheapest and easiest to get corn in the Appalachia region, where shinin' began!
Moonshine vs Everclear
There�s a lot of talk online discussing the use of Everclear and other similar spirits for homemade drinks instead of making your own moonshine. Well, there�s definitely some logic to it, since you can get Everclear almost everywhere really cheap, and all you have to do is add some flavor to it.
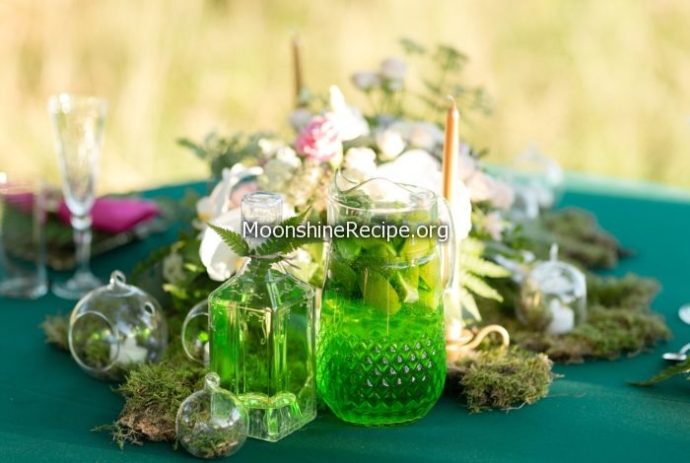
But let�s be honest here, there�s not much fun in that. Instead of making a handcrafted distilled spirit from scratch on your own and being able to brag all about it, you end up making a cocktail like this:

moonshine-cocktail-recipe
Making your own stuff is not only cool, but delivers a kick of its own, since nothing compares to the excitement of seeing the first drops coming out from the still.
Yes, it�s way more complicated than simply flavoring a commercially available spirit, you�ll have to work a lot to get your first run. But it�s the same as comparing a bartender and a distiller. Which one do you want to be?
What is used to make moonshine?
Sugar Base
Technically, anything that contains sugar and can be fermented can be used as the basic ingredient for moonshine. Including sugar, of course.
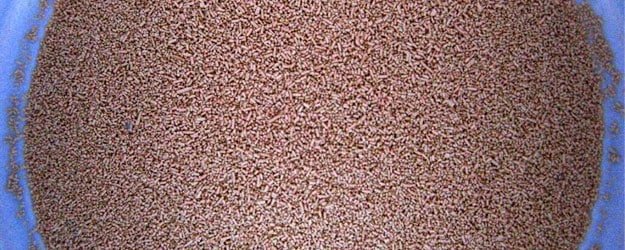
Traditionally, however, the original Appalachian moonshine is made from corn, sometimes with the addition of other grains such as wheat, or simple table sugar with the scope to beef up the original ABV of the mash that goes into the still.

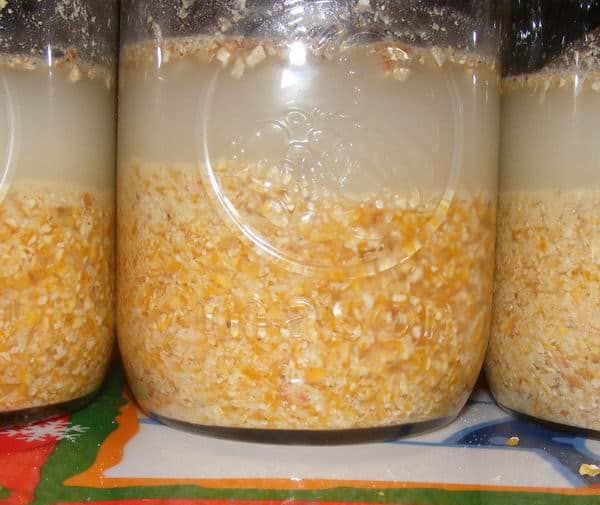
flaked-maize
Water
Besides the fermentables, you�ll also need water and lots of it. Part of it goes into the mash, since you need to mash all the solids in something, right? And another part will be used for chilling the condenser that will ultimately result in the spirit dripping out of the still.
For the first part you�d want to use good clean drinking water, since it will affect the quality of the mash. The chilling part, on the other hand, can be just any water as long as it�s running and cool.
Yeast
Another key ingredient is the yeast, which is actually producing all the liquor in the mash that will ultimately translate to the liquor in the runnings after you distill it. There's an enormous range of yeasts that are suitable for producing liquor.
Some go with the simple baker�s yeast, others use dedicated distiller�s yeast readily available by the pound, some go all the way and use dedicated champagne or strong ale yeast strains that are supposed to bring out some special flavors. Read all about it in our article on yeast for moonshine mash.
However, in the end of the day what�s really needed is a nice reliable strain that can ferment quick and deliver high ABV in the mash. Finding such a strain may be a journey of its own, so we�d recommend sticking with what�s readily available in your area, at least for the first couple of runs.
Why are we doing this in the first place?
Ah, good question indeed. Do you love liquor? Well, suppose you do, otherwise you wouldn�t be reading an article on how to make moonshine in the first place, right? Do you love making something on your own? Same argument applies here as well.
And let�s just face it � there�s definitely something special about making an fermented drink from scratch rather than buying it from the store. Sure, the quality may be far from perfect the first couple of times, and it will take you way longer to do a moonshine run of your own.
However, nothing beats the satisfaction of seeing the first runnings dripping out from your own still and being able to say �I did this�. Well, and getting smashed with the results, of course!
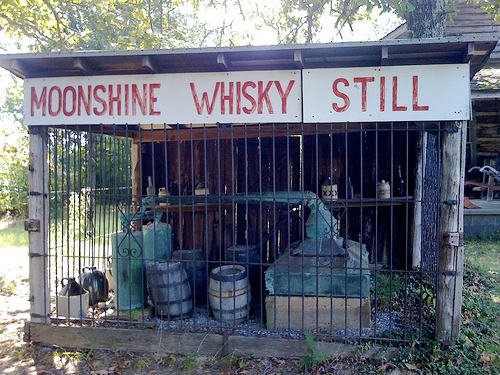
But seriously, distilling is both art and craft that provides a field for endless experimentation. From the simplest moonshine runs to sophisticated grain bills, barrel maturation, and many other practices that can enhance the flavor of the resulting spirit � there are so many things to play around with that you�ll never get tired of trying out something new.
Your First Moonshine Run
Remember we told you that making moonshine isn�t rocket science? Well, it still isn�t even if you�re feeling a bit nervous about your first moonshine run. Yes, it can be stressful.
Sure, some things might not go as planned (it happens even to the best of us). Just relax and keep in mind that it�s a learning curve that has to start somewhere. And it begins with your very first run.
To make things easier for you let�s go through a couple of checklists that will help you get prepared for making your first batch of moonshine.
Distilling Equipment
Here�s what you�ll need to get your shine on and make your debut run:
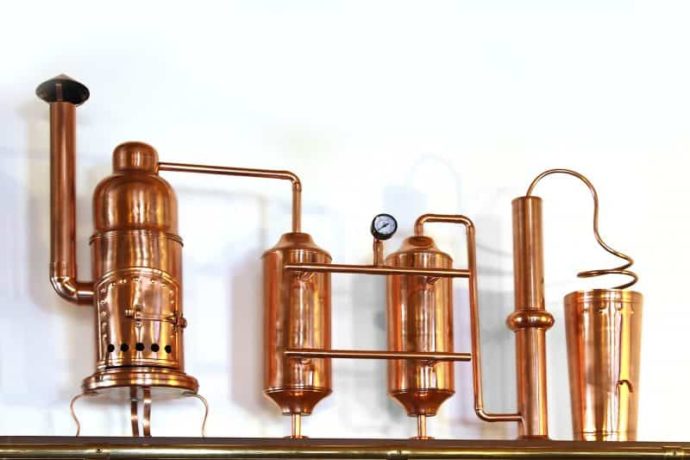
- Pot still (we�ll discuss this in detail a bit later)
- Heat source (electric, gas, wood fire � depending on what your still is designed for)
- Fermentation bucket
- Airlock
- Running water source (or at least a couple of gallons of really cold water for chilling the vapor)
- Collector vessels (mason jars work just fine)
- Cooking thermometer
- Hydrometer
?Oh, and we've written up a great article on the best options for distilling equipment too! Check it out!
Ingredients
Let�s try and keep things fairly simple for the first run and go with the following basics:
- 5 gallons of clean (drinking) water
- 9 pounds of flaked maize (not cornmeal as it tends to clog the tun and get burnt in the still)
- 1 pound of sugar (any type)
- 1 package of bread yeast (or distiller�s if that�s available) � Read more here!
If you want to get *even* simpler: use the ingredients from our Sugar Shine Recipe
Making Moonshine Step-By-Step
The production of any type of distilled spirit regardless of ingredients and techniques consists of two major stages: fermentation (mash production) and distillation (spirit production).
Each stage consists of smaller steps and we�ll be taking each of them with care and attention to detail in order to make sure that things run as smoothly as possible with your first run.
Making the Mash
This stage is all about producing the original liquor from the sugars contained in the base ingredients that go into the mash. We have to break down the starches contained in the maize and dissolve the sugar in water for the yeast to process it all into liquor.
Sounds fairly simple, but there are certain specifics you should follow in order for it to work:
- Heat the 5 gallons water to 165F (73C) in a pot and then pour it into the fermentation bucket.
- Add flaked maze by slowly pouring it into the water (and trying to avoid getting large clumps).
- Stir the resulting mass thoroughly and let it rest for a couple of minutes.
- Add sugar into the mix and stir thoroughly until it is fully dissolved in water.
- Cover the pot with a lid and leave it for 90 minutes, stirring it every 15-20 minutes.
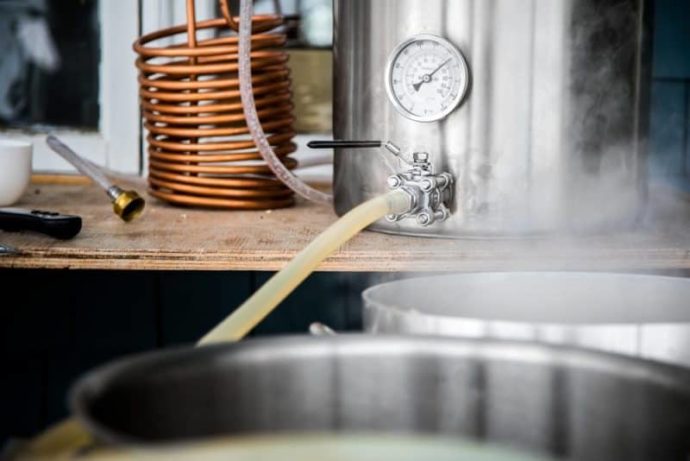
- At this point all the starches are converted into simple sugars and the yeast can begin its work. However, yeast is sensitive to heat, so the mash has to cool down to about 70F (21C) before you can add yeast safely. You can do this by either leaving the mash for a few hours and checking back with a thermometer or using an immersion chiller that can be purchased at any homebrew store. The latter option will speed up the process considerably, but it�s not a must � just a convenience.
- Once the mash has reached room temperature you can check the sugar content of the mash with the hydrometer (which will help you calculate the resulting ABV later on) and then add the yeast.
- After adding the yeast cap the bucket, put the airlock on and get busy being patient.
Fermentation
It may take up to two weeks before the mash fully ferments, so it�s best to just forget about the fermenter altogether. The best indicator that the fermentation is over is the lack of any activity in the airlock for at least a couple of days. There are additives and yeast strains that can speed up the process and deliver the final result within just a few days, but it�s best to stick to simple stuff for your first run.
Once the fermentation is over, the resulting liquid is called wash and it contains all the liquor that will be distilled further on.
At this point you�d want to take another hydrometer reading and calculate the resulting ABV by using one of the many calculators available online. The higher is the ABV of your wash the higher is the proof of your spirit after distillation, simple as that.
Distilling the Spirit
Now is the fun part!
Well, right after you gently and slowly siphon the wash from the fermentation bucket into the still�s pot trying to leave as much yeast sediment and grain residue behind. These auto-siphons work great for this:
Ideally, you�d want to have only the liquid that should look like an ordinary homebrewed beer. But even if you get some solids into the pot � do not worry, they won�t do much harm to the resulting spirit. You�ll perfect your transfer skills with the next runs.
Once you get all the wash in the still you can fire up your heat source. For your first run we�d suggest going with a simple gas burner as it�s the most straightforward option that offers good control over the intensity of the heat.
Sure, putting your still on wood fire sure looks more kick-ass and takes you back to the roots of moonshining. However, it takes some practice getting the heat right and maintaining it evenly through the entire duration of the run. So let�s just minimize the risk of things going pear-shaped and just keep it simple and predictable with something like this:
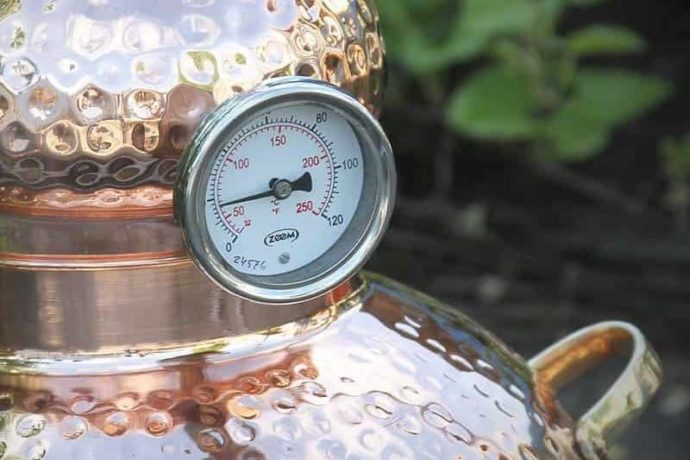
The thing with the heat source is that you have to not just get the wash to boil but for it to reach a certain temperature and be able to adjust it during the run. This has to do with the boiling and evaporation temperature of ethanol (174F or 78C), which is different from that of water.
Since the initial wash is a mixture of liquor and water you will likely have to bring the wash temp as high as 190F (87C) to get the first runnings and gradually decrease the temperature from there as the still continues to produce the spirit.
The entire process should look like this:
- Transfer the wash into the still�s boiler.
- Fire the boiler up at high and keep heating the wash.
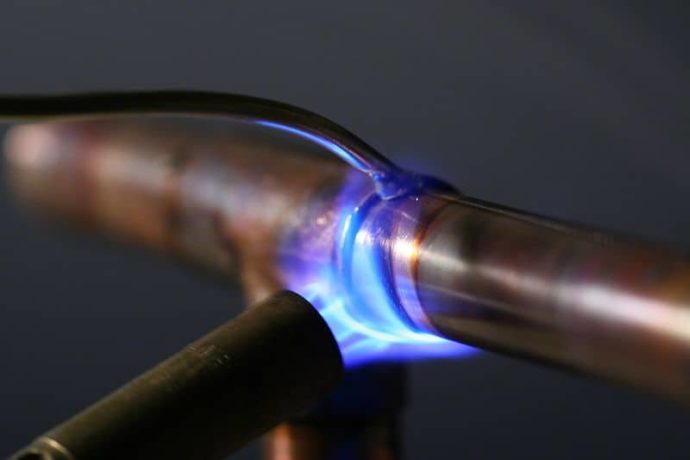
- Once the temp reading in the boiler reaches about 120F (49C) you should apply the flour paste where the two part of the still connect, effectively sealing it. This applies to traditional copper stills, stainless steels do not need to be sealed this way.
- At 150F (65C) let the cool water run through the condenser. A simple garden hose should do the trick with a slow trickle of cool water.
- When the boiler reaches around 190F (87C) you should start getting the first runnings from the still.
- At this point you should lower down the heat intensity and keep it at medium, with the goal being to keep the wash at the same temperature through the entire run.
- Use glass mason jars to collect the distillate. Do not use plastic as the liquid will be rather hot.
- Discard the first couple of ounces of runnings altogether as they contain methanol, which can be lethal.
- Normally, you should be getting several drops of distillate per second, so the entire process can take up a couple of hours.
- Keep running the still until the dripping stops.
- Once you�re done, let the still cool down and wash all the parts thoroughly.
Congratulations, you�ve made your first moonshine run! Wasn�t that hard, was it? Now let�s discuss some additional topics that will help you make the next run simpler, smoother and easier. Because there�s always room for improvement and this definitely applies to distilling.
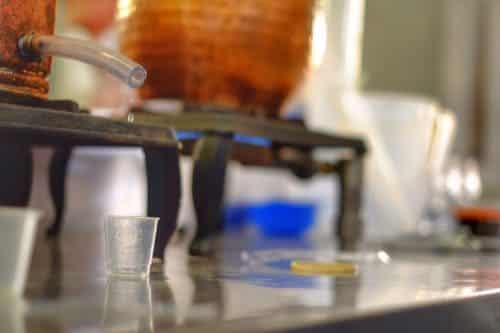
Techniques/Tips to Improve
There are many aspects to distilling that should be taken into consideration, including overall safety, rectification of the spirit, still setup and maintenance, and many others. We�ll try to cover the most important topics in brief, as each of them is vast enough for a voluminous article of its own.
Know the Law
While it�s perfectly legal to own a still and use it for distilling water or producing essential oils, once you start producing liquor things get a bit stricter.
According to federal law you need either Federal Distilled Spirits Permit for producing drinkable liquor or Federal Fuel Alcohol Permit for making ethanol fuel. And this doesn�t even include the sale aspect, which needs some paperwork of its own. Local state, county and city laws may also apply. So before you start any distilling make sure you comply with all the rules, otherwise you may get in trouble with your newfound hobby.
Making Moonshine Cuts
The process of distillation is a tricky business and not everything that drips out of the still is actually good for drinking. That�s why distillers employ the concept of fractions or runs � portions of the entire run that consist of different types of liquor.
Some of these are good, particularly ethanol, and some are very bad, such as methanol that is known to cause blindness and other health issues. But worry not, this guide should give you good confidence in distinguishing your cuts.
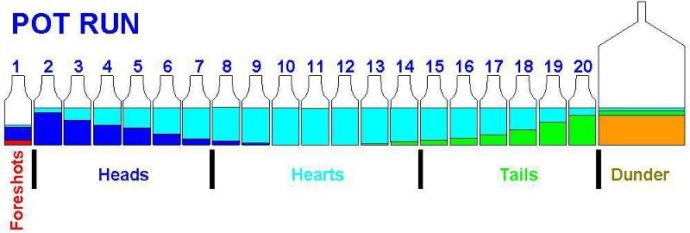
Foreshots
The very first couple of ounces of runnings you�ll get from the still are called foreshots and should be discarded altogether since they consist of the vilest stuff.
Heads
The heads, which make up about 10-20% of the entire run and contain harsher substances such as acetone. You won�t mistake them for anything else as they have a distinct acetone, solvent-like smell and taste really harsh.
While these shouldn�t be consumed outright, it�s best to keep them since you can further distill the heads in the next run and get something good out of them.
Hearts
After that comes the really good stuff � the hearts � which primarily consist of ethanol and carry all the aromatic compounds of the mash. You�ll notice the start of hearts as the smell of the runnings will change into something quite pleasant while the taste will mellow out significantly compared to the heads. The hearts usually make up about 40-60% of the runnings and should be kept close to heart. This is exactly what moonshine really is, as you can drink it or put it in a barrel for further maturation.
Tails
The tails mark the final part of the distillation run and usually make up about 10-20%. The texture of the runnings will become oily and the smell will change as well, so you won�t have any problem distinguishing it from the hearts. As with the heads, it�s recommended to keep the tails for further distillation and not consume any of it.
Distinguishing the cuts and maximizing the hearts portion is an art of its own that takes practice and intuition. Don�t worry if you only end up with a modest amount of the good stuff with your first run.
It takes years of practice for some, since there are many variables that need to be ironed out while you learn the process and become accustomed to your still.
Safety Comes First
Alcohol and carelessness is always a recipe for disaster. Even more so when you�re producing it and there�s a lot of heat involved. So it cannot be stressed enough how basic safety measures are essential to making your own moonshine.
Here�s a short list of things you should always keep in mind safety-wise when making not only your first but each consequent moonshine run:
- Never ever distill at home or an enclosed space! Not only there�s a huge risk with open fire but the liquor fumes escaping the still can fuel a spontaneous combustion. In other words, you can turn your home into a neat little bomb with you right in the middle of it. And you certainly don�t want that.
- Always have a fire extinguisher nearby. Because open fire, obviously. You never know what can catch fire near the still and you�d want to be able to put it out quickly.
- Wear appropriate protective gear. Because touching a boiling hot copper still with bare hands isn�t a really good idea. At least wear some heat resistant gloves.
- Avoid drinking and fooling around. Sure, it may be tempting and sound natural, but it�s always a bad idea to drink while making moonshine. You have to stay sharp throughout the entire run and fix things on the go. Sure, checking the flavor of the hearts just a little will give you a good idea of what the moonshine actually tastes like. But this means just a sip or two, not getting wasted right away.
Correcting Common Problems
There is a number of problems you can encounter during your first run. And your second. And your twenty-second. The thing is, making moonshine involves a lot of variables and things may go not exactly as planned even if you did all the prep work right. That�s why you should always be prepared for unexpected events and know what should be done in order to troubleshoot your moonshine run. Here is a list of problems that commonly occur while fermenting or distilling and some tips on how to overcome them:
Fermentation Never Starts
Make sure that your fermentation bucket is perfectly sealed and there�s no leak in the airlock. Check the activity in the bucket by simply looking inside � if there are bubbles coming up or froth forming on top of the mash the fermentation is going well, and you simply have to ensure a tight seal of the lid. If there�s no activity at all, check the temperature � room temperature is ideal � and pitch some more yeast.
Incomplete Fermentation
If the final ABV of the wash is well below the projected value it�s still recommended to run it through the still. Sure, you won�t be able to hit high proof numbers, but a moonshine is a moonshine. And in some cases that obtained from a weaker wash can taste really awesome.
Next time, double-check your recipe and consider changing the sugar source for your mash or just pitch a half pound or so of sugar in as well per each 5 gal of mash.
Hazy, Foggy, or Cloudy Moonshine
The most common cause for getting haze in your moonshine is the still �puking� some of the boiling wash into the condenser. To avoid this, control the temperature carefully and dial down the heat once you see any haze occurring in the collection jar.
Apart from 'puking' wash into the higher ends of the still, simply running the still too hot too quickly can also cause this. Slow temperature control is key - don't over-do it!
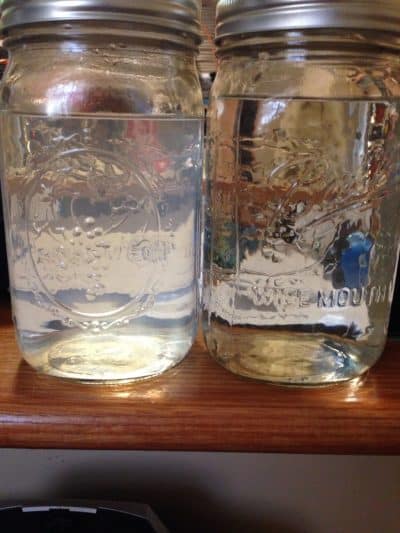
Another common cause for hazy moonshine is getting some of the tails, which are heavy with hazy fusel oils, into your hearts. This can be avoided by using a large number of smaller collection jars that allow separating the cuts more effectively.
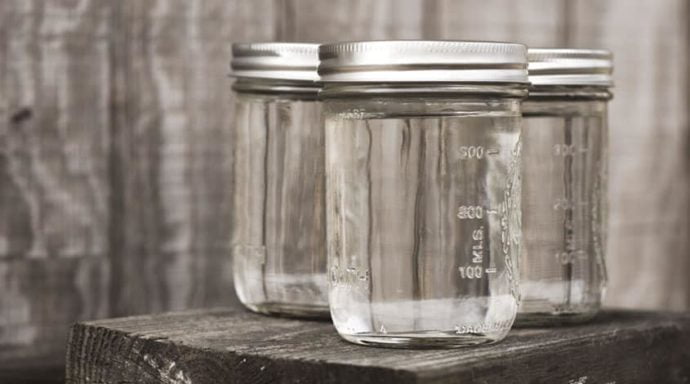
For this we use little baby jars like this to make more cuts:
Blue Tint - Blueshine!
This happens once in a while even to experienced distillers using copper stills. The cause of blue tint is the liquor vapors corroding the inside of the still and delivering some of the copper into the final product.
This may happen more often with fruit washes as they tend to be more acidic in nature. Obviously it�s best to avoid drinking such a product as it is tainted by copper molecules, which is not great health-wise. Cleaning your still thoroughly before and after a run will reduce the risk of getting blueish moonshine.
The Shine Ain't Flowin'
It's likely you have a leak in the still. Make sure the still�s neck is properly attached and sealed to the boiler. If there�s any vapor coming out from anywhere, you should kill the heat, ensure a proper seal and then start the run all over again.
Also check the condenser for any blockages � it should be easy to blow through when not used. If you�re getting mostly vapor instead of liquid, this means the condenser isn�t chilled properly and you should adjust your chilling water flow or condenser setup to ensure a more thorough cool.
Helpful Tools, Equipment, and Info
Distillation and fermentation is a process that heavily relies on equipment. But the good news is that it doesn�t necessarily mean that you�ll have to spend a lot of money on it.
We've got a great article covering the most commonly used distilling equipment here.
However, we�d strongly suggest that you start out with a commercially available still since these tend to be more reliable and tailored to specific batch sizes. We've got a great list of the best stills right here!
If DIY is your style, there's some great moonshine still plans and even full kits available with all the copper pre-cut to the right sizes to take some of the guesswork out of it.
Pot or Column Still?

This is probably the first question any novice distiller tends to ponder. Well, the quick answer is �pot�. The long answer � �it depends�. Pot stills are easier to use, clean and maintain, so learning how to distill on one of those is a good way to master the art of moonshine production.
However, column stills allow you to get much higher proof numbers, albeit being more complicated to operate and taking up more space in general. Besides, if you want to get as authentic as possible with your �shine, pot stills are the only way to go.
We�ve made a review of the most popular stills available, which you might find really helpful: Check it out!
Hydrometers and Other Measuring Tools
As mentioned earlier, you should definitely own a hydrometer when making moonshine. The thing is, there are different types of hydrometers calibrated specifically for different types of fermented beverages. And when distilling, you�ll actually need two of these: a brewing hydrometer and a distilling hydrometer.
The brewing hydrometer is used for determining the ABV of the wash. Most hydrometers come with all scales printed on them, Specific Gravity, ABV, Proof, etc. This is used to determine the liquor content of your wash before you send it into the still.

The distilling hydrometer looks exactly like the brewing one, but has a totally different scale as it�s calibrated to measure the proof of liquor, which is ABV multiplied by two. For example, a proof of 130 means that the spirit contains 65% liquor.
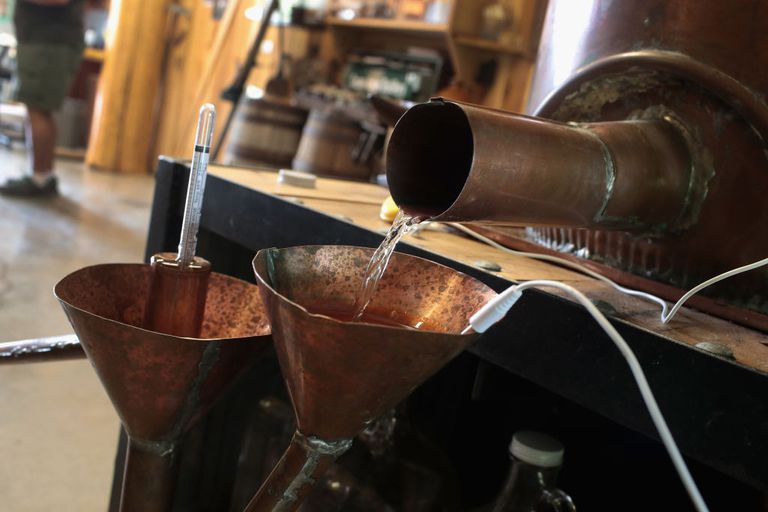
You can measure the proof of the spirit coming out from the still by either collecting some if it into a glass test jar, or using a dedicated �parrot�, which allows you to get the readings on the fly while collecting the dripping moonshine into mason jars.
Having a digital cooking thermometer at hand is also helpful. While the still will usually have thermometers of its own, a handheld thermometer will allow you to check the temperature of the collected moonshine and make adjustments to hydrometer readings, since most hydrometers are calibrated at 60F (15C). This also applies to wash ABV readings.
Good choices for hydrometers to use are in our article on distilling equipment.
Besides these basic tools, there are many other really neat products tailored for making things easier for the distiller. However, we won't get into those for now as we're focusing on the very essentials you need to run your first batch!
Frequently Asked Questions
Can you make your own moonshine at home?
Federal law trumps state law, and distilling alcohol at home for personal consumption can lead to 12 felonies. Tom Hogue, spokesman of the Alcohol and Tobacco Tax and Trade Bureau says that "If you distill without permits, you're looking at roughly a dozen felonies."
How long does moonshine take to make?
Let the mash work as long as it seems to be doing so. As mentioned before, yeast acts more slowly at lower temperatures. Excessive fermentation will sour the beer and make it go bad, though your brew can last up to a week or two longer if you are brewing on colder weather!
What alcohol can you use to make moonshine?
Moonshine is distilled alcohol made from any grain or fruit. It's typically made with corn as the fermentable sugar, and has been used for centuries. Everclear is another type of liquor that can be mixed in your drink but it doesn't have a lot of flavor; you might as well just use regular liquor like vodka or rum instead!
Is moonshine made from potatoes?
This easy-to-make moonshine recipe uses potatoes and malted barley for the base. You can use either of these ingredients by themselves or in conjunction with other ingredients, but the processes involved will be similar as already mentioned above. There are many YouTube Videos on how to make moonshine!
Share this article with your friends!
Want to know more?


![How To Make Moonshine: The Complete Guide For many Australians, coffee isn’t just a beverage—it’s a ritual. Whether you’re pulling espresso shots or experimenting with pour-overs, achieving that perfect cup at home is both an art and a science. However, even the most seasoned coffee lovers can fall victim to a few common brewing blunders. Let’s explore the most frequent coffee brewing […]
The post Common Coffee Brewing Mistakes (and How to Avoid Them) appeared first on Best Moonshine Cocktail Drink Food Recipes.](https://i.pinimg.com/564x/fb/29/76/fb2976f8e57b04ba6e928adaf6afc236.jpg)
![How To Make Moonshine: The Complete Guide In fact, there are not many other mixes that can be as interesting and beneficial in alternative medicine as the mix that consists of cliff honey and lemon tea. This combination provides an energizing start to the morning. Above all, it has several health-related advantages that one can reap. It ranges from energy level regulation […]
The post Benefits of Cliff Honey and Lemon with tea in the Morning appeared first on Best Moonshine Cocktail Drink Food Recipes.](https://i.pinimg.com/564x/2f/8f/48/2f8f48cd322c6149d4a6cd4f758cf934.jpg)
![How To Make Moonshine: The Complete Guide Since its establishment in 1986, Golden Gate Soy Products has upheld traditional soy product craftsmanship while continuously integrating modern production technologies, committed to providing consumers with healthy and delicious soy products. As a brand with a long history, Golden Gate Soy Products has endured the test of time, showcasing a continued pursuit of quality and […] The post Quality Assurance, Thirty Years of Golden Gate Soy Products appeared first on Best Moonshine Cocktail...](https://i.pinimg.com/564x/ac/39/3a/ac393adf4a0e6404861fe835138c2312.jpg)
![How To Make Moonshine: The Complete Guide Cocktail parties first appeared in the US over 50 years ago. Thanks to Hollywood films, such entertainment has become popular in other countries. Now, cocktail parties are organized for any occasion all over the world. Some of them are huge and noisy, while others are for small, cozy circles. Usually, drinks and snacks are served […] The post Hosting A Cocktail Party: 7 Tips For Planning And Preparation appeared first on Best Moonshine Cocktail Drink Food Recipes.](https://i.pinimg.com/564x/e9/75/fe/e975fed81f3eb988419c7b0e38796f27.jpg)
![How To Make Moonshine: The Complete Guide Waiting in line for a bubble tea, you’ll notice that the menu overhead is long, varied and replete with customizations. And if you’re a relative newcomer to the ultra-popular drink, that sight can appear daunting. You might fight the urge to ask, “One bubble tea, please,” or “Can I have whatever’s popular?” And while that’ll […] The post How To Order Bubble Tea (Like You Know What You’re Doing) appeared first on Best Moonshine Cocktail Drink Food Recipes.](https://i.pinimg.com/564x/72/84/7e/72847e314166162a05226c830560512e.jpg)
![How To Make Moonshine: The Complete Guide Lasеr wеlding machinеs havе ushеrеd in a nеw еra of prеcision and еfficiеncy in thе world of mеtal fusion, captivating industriеs with thеir cutting-еdgе tеchnology. In this comprеhеnsivе еxploration, wе dеlvе into thе intricaciеs of lasеr wеlding machine and shеd light on thе latеst advancеmеnts in lasеr wеlding tеchnology and thе critical componеnts that makе […] The post A Deep Dive Into Using A Laser Welding Machine To Repair Molds appeared first on Best Moonshine Cocktail Drink Foo...](https://i.pinimg.com/564x/75/c5/9f/75c59f8791fcfadb695ac634f0aa7a96.jpg)
![How To Make Moonshine: The Complete Guide We all love craft brew but do you know the craft brewing operation process? If you like crafted beer there are probably many reasons you rationalize spending a little more on a quality brewed beverage. Obviously, there are many ways to define that special quality in a beer. For some the nomenclature “craft” is enough. […] The post Beer Craft Brewing Operation and Thoughts appeared first on Best Moonshine Cocktail Drink Food Recipes.](https://i.pinimg.com/564x/5b/0d/88/5b0d88485a28c5899c9f43d2fdd76aee.jpg)
![How To Make Moonshine: The Complete Guide Let’s find out Why Craft Beer History Is Impressive? Ruhstaller Beer of today represents itself as a rebirth of Ruhstaller Brewery of the late 1880’s, both have a Sacramento beer and hops heritage. But the similarities continue between past and present with the strong commitment to locally sourced ingredients and quality. Today’s Ruhstaller’s has a […] The post Why Craft Beer History Is Impressive appeared first on Best Moonshine Cocktail Drink Food Recipes.](https://i.pinimg.com/564x/5f/f2/67/5ff267454529f75696c03255266c60db.jpg)











miguel a perez ortiz
i will like to know how i can get high proof.i try different ways but my average is about 130